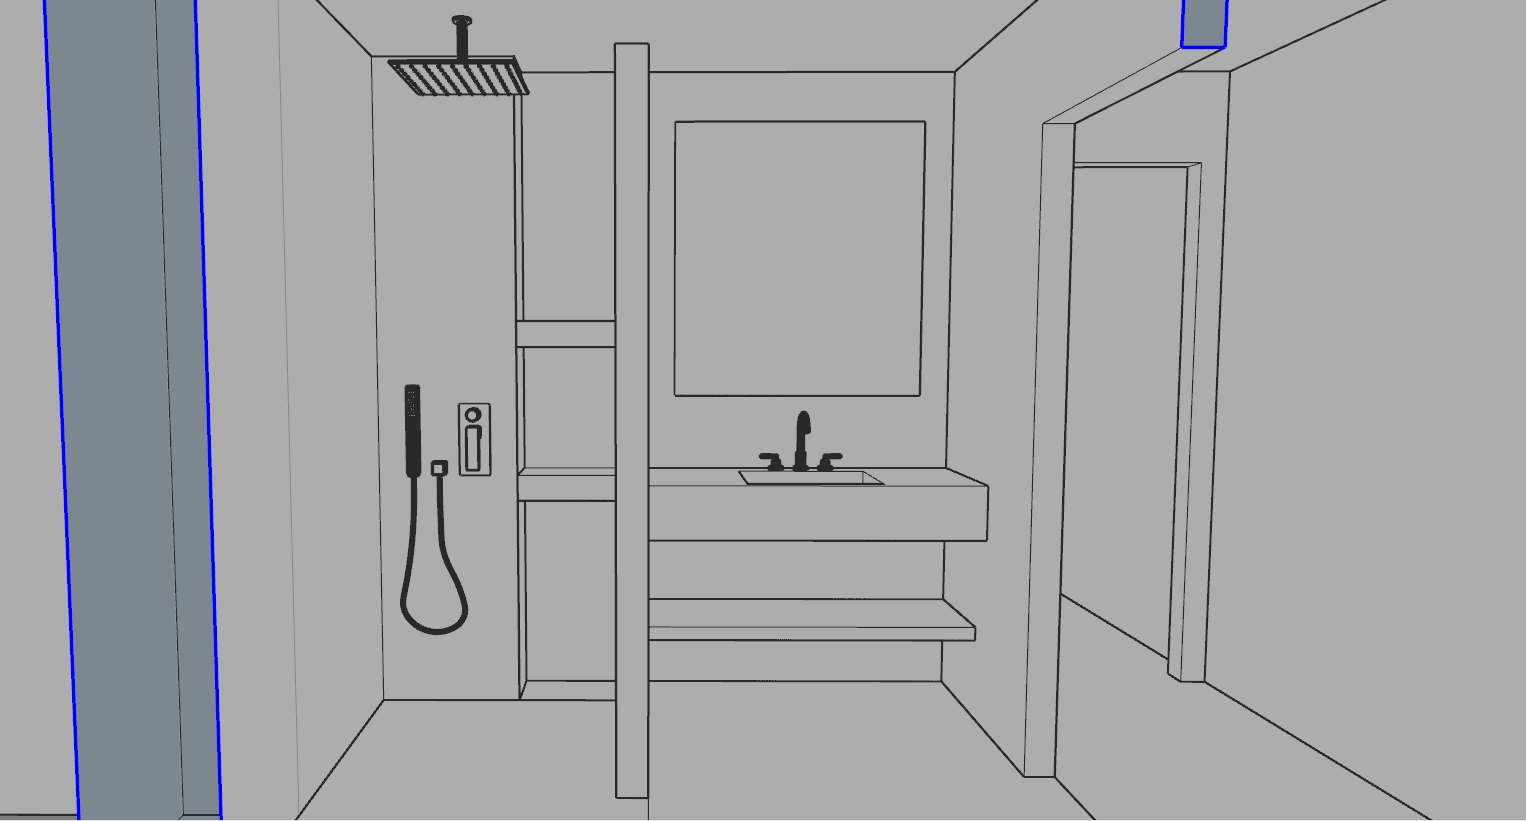
use the attached references only to reconstruct the architectural geometry of the bathroom the objective of this first iteration is not to develop the final materiality but to accurately reproduce the proportions layout geometry and camera position reference hierarchy reference 1 primary use the first sketchup perspective as the primary reference for the overall composition and camera viewpoint reference 2 use the second sketchup perspective to understand the geometry of the shower partition wall vanity and entrance reference 3 use the third sketchup perspective to clarify any remaining spatial relationships where they are not fully visible in the previous views reference 4 floor plan the floor plan is the authoritative reference for room dimensions wall locations partition location sanitaryware positions door positions window location if any discrepancy exists between the perspectives and the floor plan always follow the floor plan reference 5 camera position the fifth reference shows the exact camera position and viewing direction marked in red on the floor plan the red markup indicates camera location viewing direction approximate field of view this reference is authoritative for the final composition camera maintain exactly the camera position shown in reference 1 confirmed by the camera location diagram in reference 5 the render shall use a normal architectural perspective approximately a 35 40 mm full frame equivalent lens do not use a wide angle lens do not move the camera backwards do not increase the field of view the objective is to maintain the compact feeling of the real bathroom image boundaries the left and right edges of the sketchup perspectives are intentionally cropped they do not represent the physical limits of the room specifically the shower continues beyond the left edge of the image the entrance continues beyond the right edge of the image these cropped edges are simply the limits of the camera framing do not enlarge the room because of these cropped edges bathroom geometry reconstruct the bathroom exactly as shown in the references maintain room proportions ceiling height wall positions shower dimensions partition wall location vanity location entrance location window location do not reinterpret the architecture do not make the bathroom larger than shown in the floor plan window the fa ade is located on the left side of the bathroom create one window centred behind the vanity the window sill starts approximately 1100 mm above the finished floor the window head aligns horizontally with the top of the partition wall the top of the mirror approximately 2300 mm above finished floor use a white aluminium frame similar to the other apartment renders partition wall the divider between the shower and vanity is a masonry partition it is not glass the partition stops at approximately 2300 mm does not reach the ceiling aligns with the top of the mirror aligns with the window head toilet must not be visible from this perspective as it is at the left side behind the camera shower create an open walk in shower include ceiling mounted rain shower hand shower concealed mixer recessed wall niche the shower occupies the left side of the bathroom exactly as shown in the references vanity create a floating monolithic vanity specifications thickness 200 mm width according to the floor plan below the vanity create a second floating shelf shelf thickness 35 mm both elements remain centred below the mirror mirror create a large rectangular mirror its top edge aligns exactly with partition wall height window head entrance the entrance is located on the right side keep the doorway partially cropped by the right edge of the image do not reveal the complete doorway this cropped composition is intentional temporary materials for this first iteration use only neutral placeholder finishes white painted walls white painted ceiling neutral grey floor white masonry partition white floating vanity white floating shelf white aluminium window clear glazing do not introduce the final material palette yet important the priority of this iteration is 1 camera position 2 room proportions 3 architectural geometry 4 spatial relationships 5 composition photorealism and final materials are not important at this stage the final image should faithfully reproduce the compact bathroom shown in the sketchup references with the same viewpoint indicated by the camera diagram before proceeding to the material development phase